

Custom Support Rail Solutions for Safer Bathrooms and Stairs
2026-09-23
When a simple reach for balance turns into a near miss, the bathroom and stairs stop feeling like home and start feeling like hazards. Standard grab bars rarely match your layout, your grip, or your life. That's where custom support rail solutions come in—tailored for safer bathrooms and stairs without compromising your space. From moisture-prone shower walls to awkward stair landings, Suncare designs rails that blend safety with subtle style. Here's what to consider before you install your next handhold.
Why One-Size-Fits-All Rails Leave Dangerous Gaps
Standard rail systems are built around a narrow set of assumptions about height, mounting surface, and clearance. When a worksite deviates even slightly from those assumptions, the result is rarely a close enough match. Loads shift, operators reach over or around, and the rail that was supposed to contain the risk simply stops doing its job at the exact point where the variation begins.
The most dangerous gaps show up where two different rail sections meet or where a fixed rail runs into a piece of equipment that was installed later. These transition zones are seldom measured in the original design, so they end up covered by improvised brackets, bent tubing, or nothing at all. A visitor walking the line might see a continuous barrier, but a worker who has slipped knows the truth: the protection is not continuous.
That false continuity is the real hazard. It breeds complacency. Managers assume the rail is doing what it should, while the actual gap sits waiting for the wrong step or the wrong stumble. Closing those gaps means treating every run of rail as a custom assembly, not a catalog item.
Bathroom Rails That Handle Wet Hands and Hard Falls
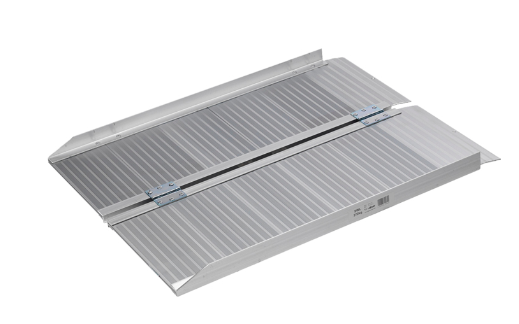
Most bathroom rails claim to support you, but few are built for the reality of slick palms and sudden slips. A well-designed rail pairs a textured grip surface with a shape that lets your fingers lock in, even when wet. Look for rails with a slightly roughened finish or subtle ridges—not so aggressive they irritate the skin, but enough to create friction where smooth metal usually fails.
When a fall happens, the rail needs to hold more than just your balance—it has to anchor against hard impact. Check the mounting system: rails that screw into studs or use heavy-duty backplates spread load across the wall, preventing the rail from pulling loose during a stumble. Cheap hollow-wall anchors are a false sense of security. Choose rails rated for at least 250 pounds of force, and install them at the natural reach point, not just where they look symmetrical.
Finally, think about hand travel. A rail that runs continuously along the tub edge or shower wall gives you a sliding grip as you move, so you never have to let go and re-grab with wet fingers. This matters more than most people expect—each regrip is a moment of vulnerability. By combining fast-drying materials, a secure mount, and an uninterrupted path, you turn a simple safety feature into something that genuinely handles both daily moisture and the worst-case fall.
Stairway Support That Follows Your Steps, Not a Template
Every staircase has its own quirks—width, turn angles, landings, rail placement. Real support means listening to what your stairs demand instead of forcing a standard answer. We ask about measurements, daily routines, and the little frustrations no manual covers. Then we shape guidance around that.
You won't get a scripted checklist. If your steps have an odd curve or a narrow landing, the advice adjusts. We map out how each part of the stairway affects movement, safety, and comfort. That way, the help you receive matches the path you actually walk.
The goal isn't to hand you a generic leaflet and wish you luck. It's to stay with you as your needs shift—whether that means rechecking clearances or rethinking placement after a change at home. Support like this bends with your stairs, not against them.
The Hidden Anchors That Keep Rails From Pulling Out
Steel rails experience constant longitudinal forces from thermal expansion, braking trains, and wheel acceleration. Without hidden anchors, these forces gradually push or pull the rail along the sleepers, a phenomenon known as rail creep. Over time, creep can open gaps at joints, misalign switches, and even yank rails out of their fastenings. The real defense lies in components you rarely see from trackside: anti-creep devices, embedded anchor bolts, and pre-installed threaded inserts inside concrete ties. Each locks the rail base to the sleeper with enough friction and mechanical interlock to resist movement, yet still permits controlled thermal breathing.
One of the most overlooked types is the cast-in shoulder or ductile iron insert buried within a concrete sleeper. A shouldered bolt or screw spike passes through the rail fastening clip and threads into this insert. The tapered internal threads bite into the bolt, while the outer ribs of the insert key into the concrete itself. This dual grip spreads pull-out loads over a large volume of the tie, preventing a single point from failing. In older timber-track setups, a different hidden anchor appears: the screw spike with a coarse wood thread. Its angled flanks compress wood fibers as it's driven, creating a resilient hold that resists both vertical lift and horizontal shove. Even a small reduction in spike torque can allow the rail to slide by millimeters per day - enough to accumulate serious misalignment within weeks.
Maintenance crews rarely see these anchors until a rail is unclipped, but their condition can be judged by indirect signs. A tie with a stripped insert or rotted screw-spike hole will let the rail seat rock under load, producing a dull thud instead of a crisp metallic ring. Modern inspection cars measure rail longitudinal resistance indirectly by monitoring short-wave alignment changes over repeat runs. When hidden anchors begin to lose grip, the fix often goes beyond retightening - epoxy injection into cracked insert pockets, replacement of corroded bolts, or even full tie renewal. It's a reminder that the most critical parts of a railway are often the ones buried out of sight, quietly holding everything in place against forces that never stop pulling.
Finishes That Blend With Tile, Wood, and Paint
Matching hardware finishes to a room full of tile, wood, and paint can feel like walking a tightrope. Nickel and brushed brass tend to disappear against warm wood grains, while matte black creates a bold frame that lets both painted cabinets and ceramic backsplashes breathe. The trick is picking a metal tone that echoes one accent in the tile veining or the undertone of the floor stain, not competing with it.
For spaces where tile patterns already steal the show, a satin bronze or graphite finish works like a quiet handshake between all the materials. It pulls warmth from oak floors without shouting over a painted island, and it softens the cool edge of a white subway tile wall. Avoid high-gloss chrome if the wood has red undertones or the paint is cream-based—it can introduce a sharp, clinical contrast that cheapens the whole palette.
When in doubt, hold a few samples against the actual tile and a painted cabinet door at different times of day. What looks muddy under store lights often settles beautifully next to honed stone and flat wall paint. The goal isn't a perfect match, but a finish that lets each surface keep its own voice while staying in the same conversation.
A Five-Minute Monthly Check That Prevents Rail Failure
Most rail flaws begin as hairline fractures near bolt holes or weld zones, invisible until temperature swings turn them into cracks that spread fast. A five-minute monthly check zeroes in on those high-stress points with a bright flashlight and a small mirror. Run your fingers along the running surface first, feeling for spalls or tiny ridges that shouldn't be there. Then scan the web and base for rust blooms or dull grey streaks — early signs of fatigue.
The routine isn't complicated, but consistency matters more than speed. Pick the same segment each month and walk it in both directions. Tap suspected spots with a light hammer; a dead thud often means internal separation. Mark anything questionable with spray chalk and measure its length. If a crack grows by more than a few millimetres between checks, schedule a closer ultrasonic test before the next heavy traffic cycle.
What makes this short inspection so effective is that it trains the eye to catch what routine maintenance often misses. Keep a simple log on your phone or in a pocket notebook. Note the date, temperature, and any marks you find. Over a few months, that record reveals whether a flaw is stable or on the move — giving you enough lead time to replace a rail section instead of dealing with a sudden break under load.
FAQ
A custom rail is shaped and sized to fit your specific space and needs, whether that's an oddly angled stairway or a shower enclosure with limited stud placement. You can choose the length, diameter, finish, and even add textured grips in just the right spots, so it feels like part of the room rather than a medical afterthought.
Start by thinking about where you brace yourself or shift weight: stepping over the tub edge, standing from the toilet, or reaching for a towel. We often recommend a vertical rail near the shower entrance for balance and a horizontal one beside the toilet. If you use a shower bench, a short angled rail can make sitting and standing safer.
Yes, and that's a big reason people choose custom solutions. You can opt for a slimmer profile that follows the stair line or matches your existing banister. For narrow staircases, a recessed or wall-hugging design keeps the pathway clear while still giving you a solid handhold.
Common options include brushed nickel, matte black, oil-rubbed bronze, and powder-coated colors. Texture matters more than finish for grip; you can request knurling, ribbing, or a subtle non-slip coating only where your hand naturally lands. A smooth finish elsewhere keeps cleaning simple.
Absolutely. We size the rail and mount it into wall studs or blocking rated for at least 250–300 pounds of load, and we can add extra mounting points for long spans. For stairs, we often use reinforced brackets that don't twist under downward pressure.
Many people in rentals use clamp-on rails for the tub edge or a tension-mounted pole for the bathroom, but true custom rails are usually permanent. However, we can design a rail with minimal mounting footprint and provide patching guidance for when you move out. For stairs, a removable banister overlay might work if the existing rail is sturdy.
Typically two to three weeks for most homes. After measuring, we confirm the design and finish, fabricate the rail, and schedule a half-day installation. If you need a quicker turnaround for a hospital discharge, we can sometimes prioritize a simpler design.
Not really. A quick wipe with mild soap and water is enough for most finishes. If you choose a textured grip area, use a soft brush occasionally to remove soap residue. Check the mounting screws every six months to ensure nothing has loosened from daily use.
Conclusion
Most falls happen in the very places we assume are safe—bathrooms and stairways—yet standard rails often miss the mark. A generic grab bar leaves inches of unsupported wall exactly where a slipping hand reaches, creating a dangerous gap between the bar's end and the corner of a shower or the turn of a staircase. Custom solutions measure your actual layout, accounting for tile lines, stud locations, and how your family moves. In bathrooms, that means bars with textured grips that stay secure even with soapy, wet hands, placed at heights and angles that catch a fall before it starts. On stairs, continuous or segmented rails follow the true rise and run of each step rather than forcing a straight template onto a curved or uneven path.
What holds these rails in place matters just as much as the visible hardware. Hidden anchors that bite into blocking behind drywall or tile prevent the slow pull-out that plagues many installations. And because safety should not look like a hospital, the finish can be powder-coated or brushed to disappear against wood trim, blend with tile, or match painted walls. Finally, a five-minute monthly check—tightening set screws, feeling for movement, wiping down grip surfaces—keeps the system reliable long after installation. That is the difference between a rail that looks fine and one that actually catches you.
Contact Us
Contact Person: Frank Chan
Email: [email protected]
Tel/WhatsApp: 0086-13924529088
Website: https://www.suncare-medical.com